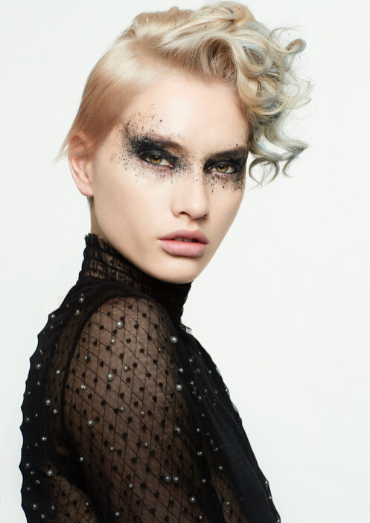
CULt’s Creative Director John-Ross Slane created a short, soft disconnected shape and here is the step-by-step how-to. The cut includes various panels of length, to create a playful exaggerated yet modern look, the colour is divine!
John-Ross explains: “I loved cutting this shape on Victoria! Her hair was overgrown and didn’t highlight her best features. By slimming her hair down on the sides and retaining length on the top, it gave her a fresh dynamic look.”
Enjoy!
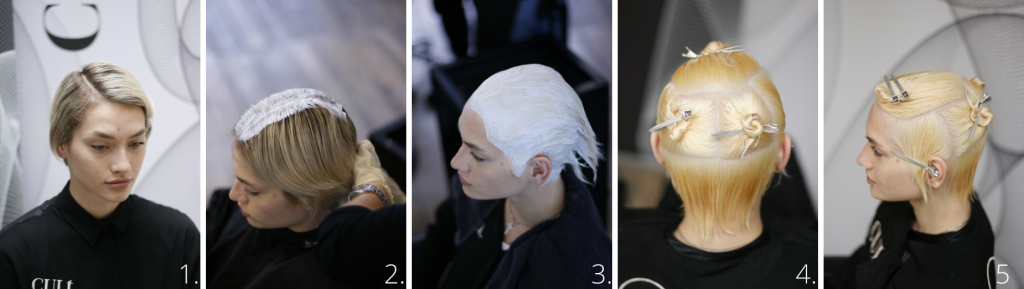
- Before image.
- Begin by applying bleach to the roots – 2cm width.
- Next apply your bleach mix to the whole head, ensuring all sections are covered and the bleach is evenly distributed. Leave to process.
- Once processed, it’s time to cut! Begin by taking a horseshoe section from the temples to the crown and section.
- Next, isolate the side area with a vertical section from behind the ear, and separate them back into two from the top of the ear.
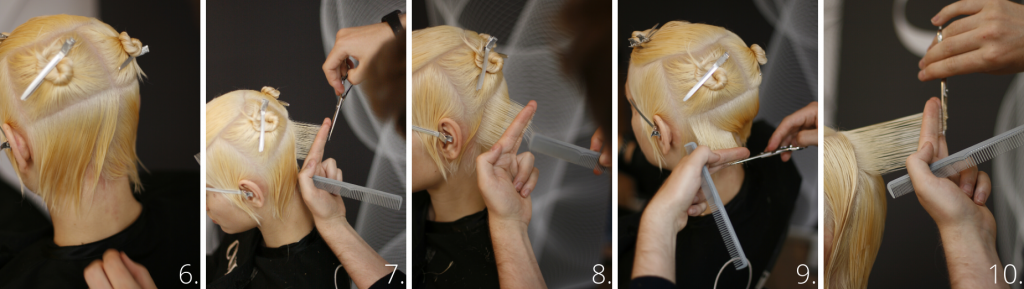
- The first section is taken vertically.
- This section is cut on the inside of the fingers working with a graduated shape, getting shorter as we cut into the nape.
- Subsequent sections are cut on the base until the round of the head is reached, at which point over direction is used to maintain length behind the ear.
- Cross-check this panel by using diagonal sections in the opposite direction to refine lengths and remove any unwanted length.
- This section is connected into the previous section below, continuing to build a graduated shape up the back of the head.
- Continue through this panel working on the base and cutting on the guideline.
- Cross-check this section, making sure to elevate the hair up to the same elevation as it was before.
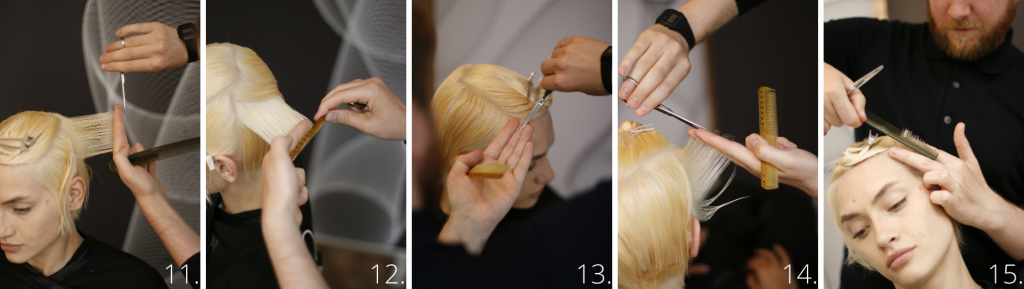
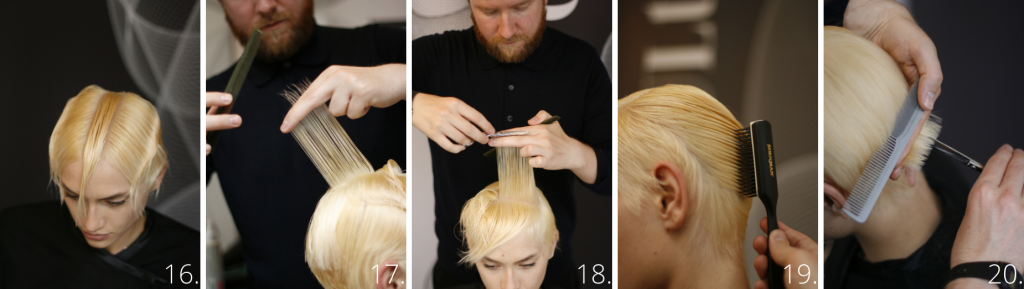
- Moving into the sides, take a vertical section and cut a fitted short layered length that goes from short to long to retain some length over the ear.
- Subsequent sections are over directed onto the previous.
- On the second side, lengths are cut shorter than the first side using a more head-hugging layer, which will help create an interesting balance on the final look.
- The top panel is then sectioned with a vertical section from the crown to the front of the head.
- This section is connected into the back panel and a new guideline is cut, that becomes longer towards the front.
- To cross-check, we take horizontal sections across the top and dust off any excess length.
- We now wrap dry the hair using a small Denman Brush to avoid creating excess volume or unwanted texture.
- We now take horizontal sections throughout the haircut and point to remove weight and soften the shape. Care must be taken to the only point on the mid-lengths and ends.
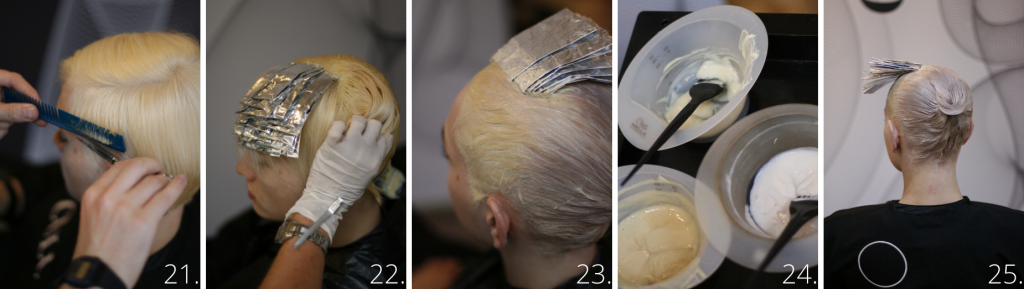
- The sides are now scissor-over-combed to fit the hair around the hairlines and create a stronger shape.
- It’s colour time! Let’s foil. Take a small section towards the front of the head and lightly apply your colour. We’ve opted for a beautiful grey/blue pigment.
- Apply a toner to the rest of the hair to get rid of any unwanted brassiness. We used two different toners due to the different tones within the hair.
- Colour image.
- Finished colour image.
At Colour World UK we believe in colourists being equally important as hairdressers to the success of a salon business! Clients deserve excellent colour services, embracing the importance of a great colour consultation through to end result. We salute manufacturers and brands offering a great product innovation which enable colour technicians to explore their creativity and offer a bespoke colour to every client. We offer colour conversation and inspiration for you to browse, and respect colour-focused education and events from what’s on and where, to our own Colour World UK event 2018 which support our industry and promise to do our best to bring you news and information to help you succeed.
Looking for some more colour inspiration? Here you go:
![]()
![]()
![]()